 Night Vision equipment has the
potential for very useful applicability for Community Emergency
Response Team (CERT) duties, particularly in the search and rescue
arena. It’s pretty safe to say that we will be searching through
damaged buildings in an area where the power is out, either because
of the disaster, or turned off on purpose for safety reasons. It
will be a very low light, or even completely dark scenario, and NVGs
can be an important tool for performing better search and rescue, as
well as helping to ensure the safety of the CERT member. But night
vision equipment tends to be expensive, especially if you try to
purchase the generation 3 (GEN3) military grade equipment. And yes,
we can use flashlights. But I can tell you from the voice of
experience of someone who has had to work in low-light and no-light
situations that lots of flashlights tend to really screw up your
eyes as they try to adjust from light to dark to light to dark…
While the military grade units,
such as the ATN gear, cost into the tens of thousands of dollars,
the good news is that adequate night vision for us “regular people”
can be purchased for less than $1000, often in the $300 to $500
dollar range. Hunters, hikers, and campers use night vision
equipment to be able to see in the wilderness at night. So
realizing the NVG utility and popularity potential in these
situations, a number of companies have come up with many affordable
options for night vision equipment that are very appropriate to
hunting/hiking, as well as what we are doing in the CERT arena.
These budget units are not nearly as sophisticated, nor do they have
the high quality vision of the high priced ATN GEN3 units, but they
are more than adequate for the purposes for which hunters/campers
use them, and the uses for which I had envisioned in CERT search and
rescue applications.
I chose the Firefield Tracker 1
x 24 Night Vision Goggle (NVG) Binocular for my equipment. This is
a GEN1 NVG unit in the $400 dollar range.
Wiki EzVid ranked these one of the seven best NVGs for 2017.
It can see in low-light environments without illumination
assistance, and also comes with its own IR illuminator for
assistance in extremely low-light and no light situations. And as I
mention later in this article, I further augmented the IR
illumination capability with a Sightmark IR-805 unit attached to my
helmet to help this unit’s ability to see in complete darkness, and
at longer distances than the built in IR illumination will allow.
In my testing, I was able to use this model in the pitch-black of my
utility room in the basement, and still see every detail of the room
in complete darkness. Outside at night, I was able to see
completely dark areas very clearly, and with good definition. The
IR-805 allows for illumination at even greater distances outside –
up to around 150 meters.
There are other similar models
of civilian use budget NVG, such as the “Ghost Hunter” units made by
Sightmark, and the Pulsar Edge NVGs. The Firefield, Sightmark,
Pulsar, Yukon, and similar units are all reasonably priced and work
well enough for my needs. However, they do not use standard NVG to
tactical helmet attachment hardware such as “rhino” mounts with a
bayonet. And since I wanted to use these NVGs with my CERT helmet,
I knew up front that mounting them to my helmet was going to be a
challenge. But one thing that I found very useful with this unit is
that it uses the same headgear that the other similar units listed
above use, and also came with a regular neck strap, such as
that used with traditional binoculars, so that I could carry and use
this unit in cases where I choose to use neither the headgear nor
the helmet.
This article illustrates how I
adapted the Firefield Tracker NVG gear to my
current CERT helmet,
and the equipment and items needed to complete the project. I will
also be putting up a separate YouTube video to explain these
procedures in the near future.
This is the comparison of the
standard headgear that comes with the Firefield, Sightmark, and
similar units to the tactical helmet that I am using as my current
CERT helmet. The helmet has what is commonly referred to as
the "NVG Shroud," which actually allows for the attachment of a
variety of components. In a recent review of the helmet, I
showed the Polaroid Cube+ camera attached. The same shroud and
mounting plate are also used as the base with which to attach NVGs.

The conundrum that I was facing
in this project is that the NVG attach mount on the front of the
headgear that came with the Firefield NVGs fits exactly onto the
attach plate that fits my helmet NVG shroud. However, I did not
want to tear apart the headgear in case I wanted to use it for
hands-free NVG operation instead of wearing the helmet. So the
problem became that I either had to obtain another similar attaching
mount piece commercially, or fabricate one myself. The plate that
snaps into the NVG shroud was the easy part. That very blank plate
comes with the helmet that I ordered, and is also the same plate
that comes with the helmet mounted camera holder for the Polaroid
Cube camera.

In my search for a way to mount
this gear onto my helmet, I first asked the Firefield folks if they
sold a mount that would attach to a tactical helmet. They said they
did not, and that something would have to be fabricated. They would
not sell me a spare headgear unit so that I could cannibalize the
attach point off of it to fabricate the unit needed myself to fit
onto an NVG shroud compatible plate. I then came up with some
diagrams of what I needed and sent this to the Firefield tech
support people to see if they could help. When I sent them the
diagrams with an explanation, they refused to answer further
emails. So again, I was stuck with finding a way to fabricate what
I needed.


Click a thumbnail to see a larger
image
Then I got lucky. After about
two weeks of searching for someone who would sell me just the
headgear, I finally found a separate headgear unit sold on Optics
Planet. The specific unit I ordered is called the Pulsar NV
Compact Head Mount - 79032 ZA-NA-79032 This is exactly the same
headgear that the Firefield, Sightmark, and other units use, the
only difference being the small piece that screws on to the
particular make and model of NVGs and connects to the attaching arm
on the headgear. The point where the NVG mount attaches to the
headgear is the exact size of the surface area of the plate itself.
So it was simply a matter of taking the front piece off of the spare
headgear that I received from Optics Planet and attaching it to the
NVG shroud plate. The beauty of being able to obtain this actual
manufactured unit, instead of having to fabricate one, is that the
manufactured unit is built to allow for one handed adjustment and
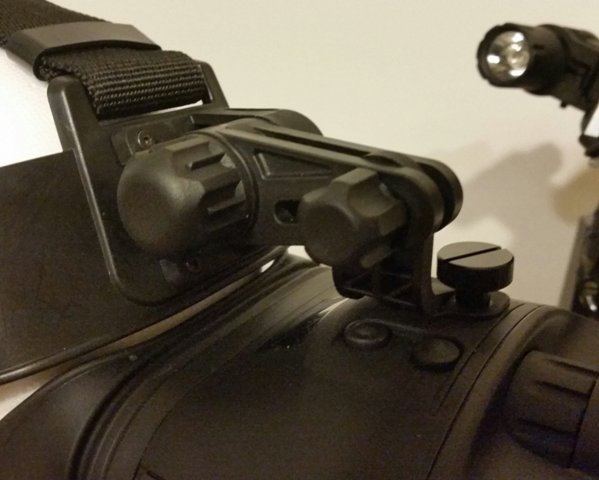
operation. Some Gorilla Glue and two screws, and the NVG arm and
NVG shroud plate are married together. Even though the mounting
piece is the identical size of the plate, only the top two of the
screw holes line up. The bottom screw holes would be where the
attachment latch of the plate to allow it to clip into the NVG
shroud is, so these cannot be drilled. Hence the Gorilla Glue!
Between the glue and the two screw holes that do match, the unit is
very secure.
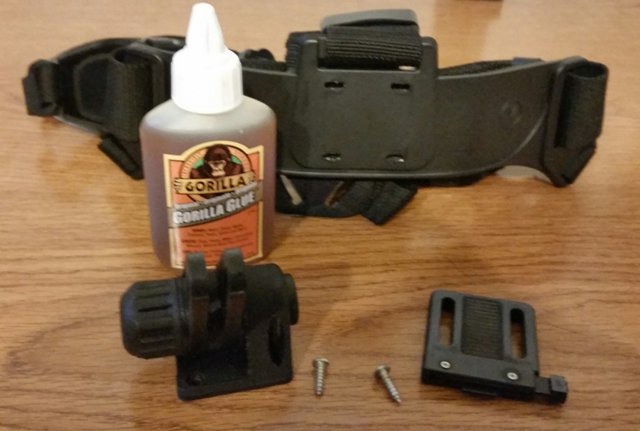
Here you see the disassembled
headgear, with the NVG attachment arm on the bottom left, and the
helmet NVG shroud plate that it will be mounted to on the bottom
right:
The finished product. I can quickly switch
between mounting the NVGs onto the standard headgear that came with
the Firefield equipment, or mounting the NVGs to my CERT helmet.



Click a thumbnail to see a larger
image
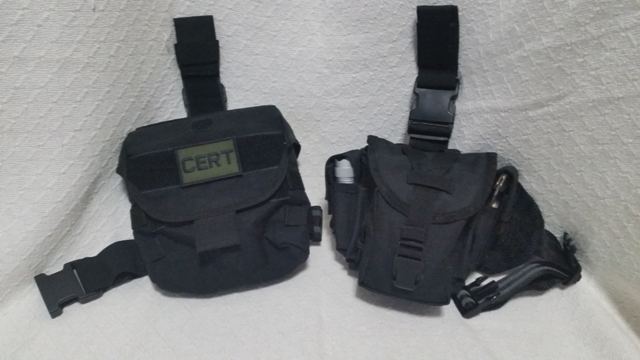
There are a variety of options for carrying the NVGs when not
mounted. I previously mentioned the regular binocular strap on
this unit. These can also be carried in a backpack or drop-leg
pouch as well. In this picture, the
pouch on the left is a Condor Drop Leg Dump Pouch. It is a fairly
large pouch with a single compartment. It comes configured for left
leg wear, but the leg strap is reversible for wearing on the right
leg. This one will easily hold both the NVG headgear and the NVG
binoculars, with room to spare. The pouch on the right has two main
compartments and two magazine pouches. I can use the magazine
pouches for additional batteries for the NVG and other electronic
components. The largest of the two main compartments is the perfect
size for my Firefield Tracker 1x24 Night Vision Goggle Binoculars.
In the smaller main pouch on the front, I keep my laser range
finders. This is a VooDoo Tactical pouch that in and of itself is
not a drop-leg pouch. But it has MOLLE attachments, and easily
attaches to a VooDoo Tactical 20-0129001000 Mesh Drop Leg Platform:
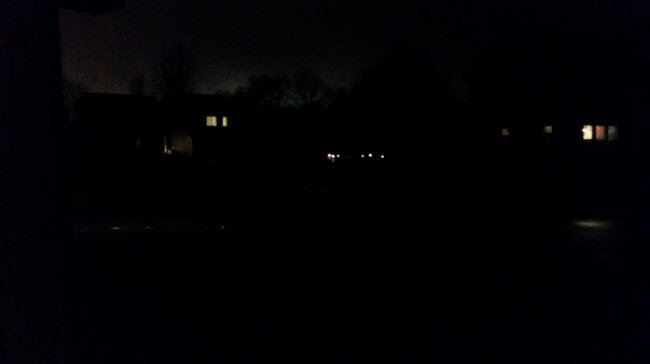
The unaided view of my neighborhood in the dark.
The houses in the view are about forty to fifty yards away:
View through the NVGs. Trying to line up
the camera on my Android with the view finder of the NVGs was a bit
challenging. The fact that it is out of focus is more my
fault than anything else. The actual view through the unit is
actually better than this:

Now I have a few different options for my CERT
helmet. I can switch from a camera to an NVG setup in a few
seconds:

Download This Article as a PDF Document

