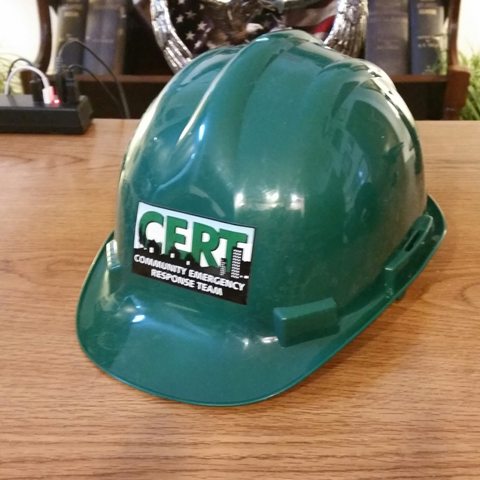
 When you go through initial CERT training, you
are issued the standard helmet, which is actually not a bad little
helmet. It is light weight, adjustable, and provides the same
bump protection that any of the typical industrial environment
helmets would provide. My main issue with this helmet,
however, is that it was a bit uncomfortable for me, and did not
provide any hands-free equipment attachment points. So I chose
a different helmet, and modified it to suit my needs for CERT
purposes. I wrote another article detailing that helmet, that
you can see here.
When you go through initial CERT training, you
are issued the standard helmet, which is actually not a bad little
helmet. It is light weight, adjustable, and provides the same
bump protection that any of the typical industrial environment
helmets would provide. My main issue with this helmet,
however, is that it was a bit uncomfortable for me, and did not
provide any hands-free equipment attachment points. So I chose
a different helmet, and modified it to suit my needs for CERT
purposes. I wrote another article detailing that helmet, that
you can see here.
But I realize that some folks may not want to go
to all the trouble and expense of building up the type of helmet I
discussed in my other article, and just want to stick with the basic
helmet, but maybe perform a couple of quick and inexpensive
modifications to add some functionality and comfort to that basic
helmet. For, I am guessing, less than $30 dollars, I was able
to add a pretty good headlamp, some padding for the plastic on the
inside of the helmet, and some additional Velcro patches for the
outside of the helmet for mounting a variety of additional items,
such as patches or other light-weight pieces of equipment.
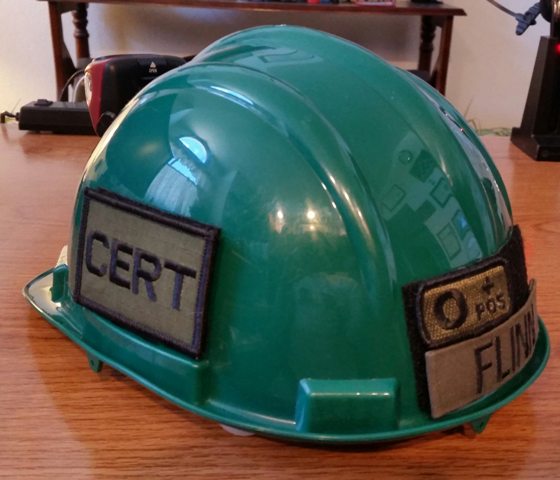
Here is the basic helmet that is issued with your
CERT gear when you first attend CERT Basic Training:
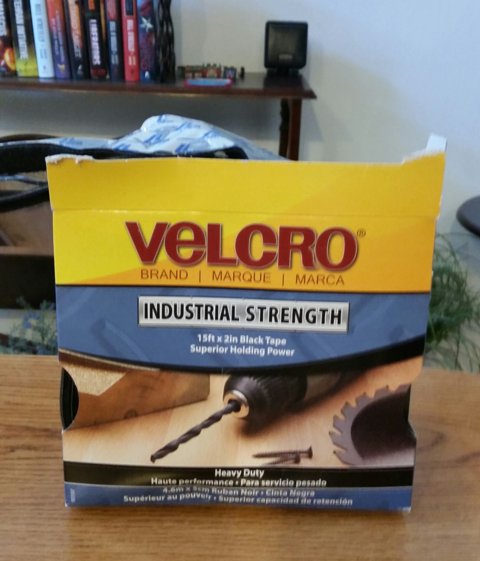
The primary tool that I used for all of these
modifications is industrial strength Velcro. This Velcro has
an adhesive backing that sticks to just about everything, and it
sticks really well.
The first thing I tackled was the plastic piece
on the inside-top of the helmet that rests on my head. This is
a hard piece of plastic, and it feels like something is poking my
head!
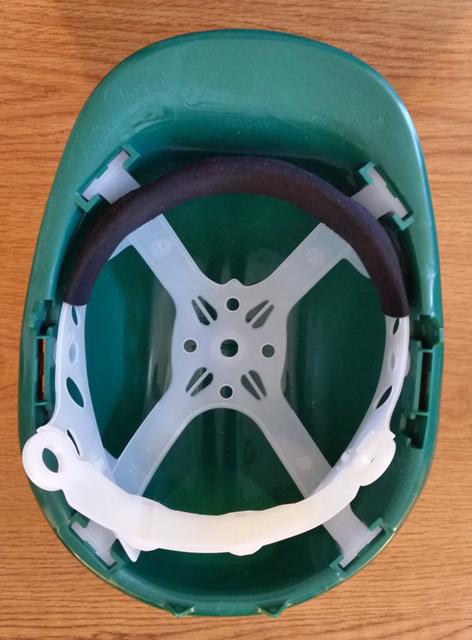
By adding a piece of Velcro loop material to this
plastic piece, I now have a much more comfortable area of the helmet
resting on the top of my head:

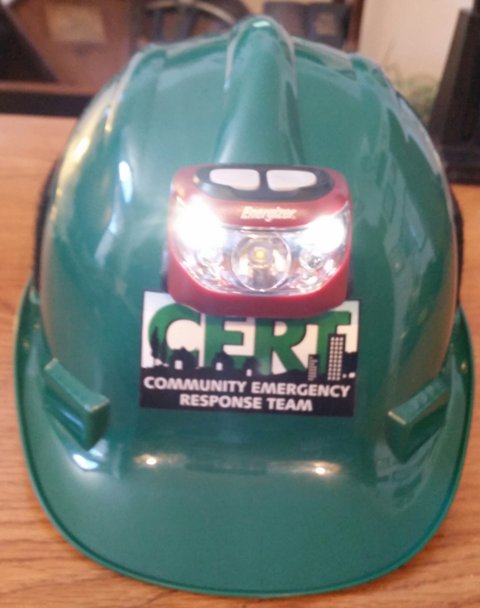
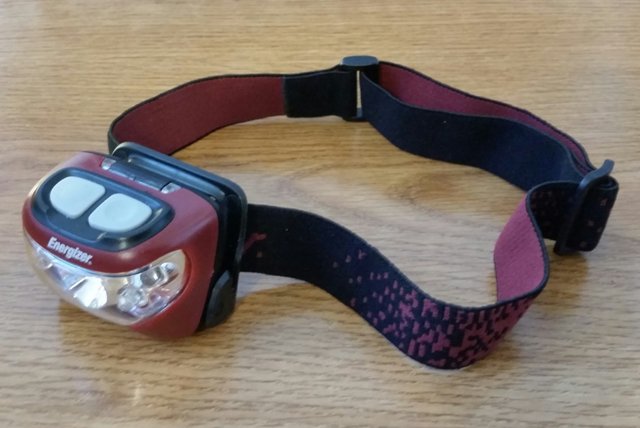
Now for the headlamp. The headlamp that I chose was an
inexpensive camping headlamp from the Wal-Mart camping section.
This is an Eveready variable mode LED light that takes 3 AAA
batteries.
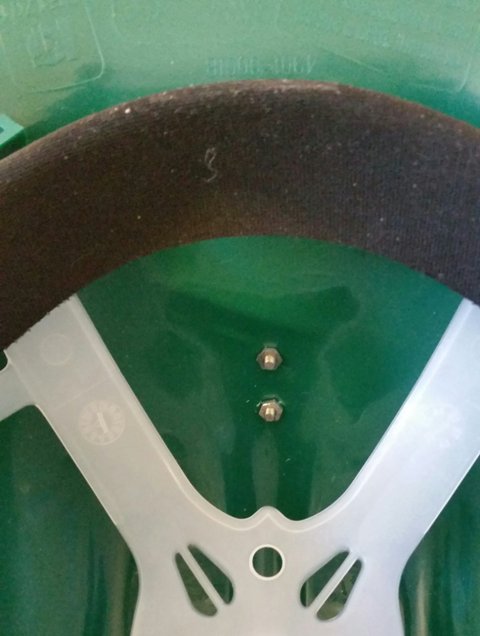
The first step is to remove the elastic headband
from the headlamp assembly, and remove the headlamp unit from the
bracket. The bracket is then easily attached with small screws
to the helmet:
View of the headlamp mounting bracket mounting
screws inside the helmet:
Replace the headlamp onto the mounting bracket,
and this portion is now completed:
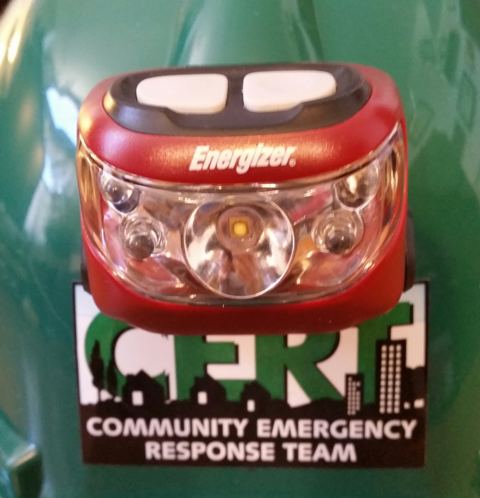
This headlamp has modes for both bright and dim
on the main white lamp in the center, two outer white lamps, and two
outer red lamps. The red lamps are important if you are in the
dark and are trying to read some documentation, or write something,
but you don't want the bright white splash-back interfering with
your eyes when they are adjusted for darkness. It's also a
courtesy when directly facing others:


Click a thumbnail to see a larger
image
Next some Velcro patches. Velcro comes in handy for mounting
things that you want to be able to quickly change, such as patches,
additional lighting, small tools, and other things. I chose to
put a large Velcro patch on each side and also in the back of the
helmet.

I then affixed my name tape, blood-type patch, and additional CERT
patches. But as I mentioned before, Velcro gives you the
flexibility to do what ever you want.
The finished product. A simple helmet that now has a
hands-free headlamp, a more comfortable resting point on my head,
and Velcro for mounting a variety of patches and other equipment.
This entire modification took less than an hour, and less than $30
to perform. As for the other items that I put on my more
advanced helmet, those items can be easily incorporated into your
CERT gear. For the night vision equipment that I discussed in
my other article, that particular unit comes with a regular regular
binocular neck strap - I can simply wear the NVGs around my neck.
The camera can either be mounted to this helmet with Velcro, since
it is very small and light, or I can use one of my other mounts,
such as a chest mount or additional helmet mount on this helmet.

Download This Article as a PDF Document